Showing posts with label St. Louis Photographer. Show all posts

5.04.2010

Tell All Tuesday - Straighten & Fill | Philadelphia Photographer

Okay, today's Tell All Tuesday is a quick one. Ever used the straighten tool before? I used it all the time when I had Elements 5, but when I made the switch to CS4, straightening wasn't intuitive and I didn't figure out how to do it for a little while.

Sometimes tilting the camera is a good idea, and sometimes it's not. When there is a clear horizon line in my image, I typically like to make that horizon line straight if it isn't already. Of course, occasionally I break this rule. And when I first started, I was tilting the camera like crazy. I've heard it said that one way to pick out a new photog is by how often they tilt their cameras! Probably true. :)

So - here are the quick and easy steps to fixing a tilted image. I'll also touch on filling in the canvas. *I learned this method from Ashley McNamara's tutorial HERE.*

Here's the image SOOC.


Find the eyedropper tool on the left palette (6th down) and change it to the ruler tool. Then click and drag to form a line along the horizon line.


Then head to Image --> Image Rotation --> Arbitrary


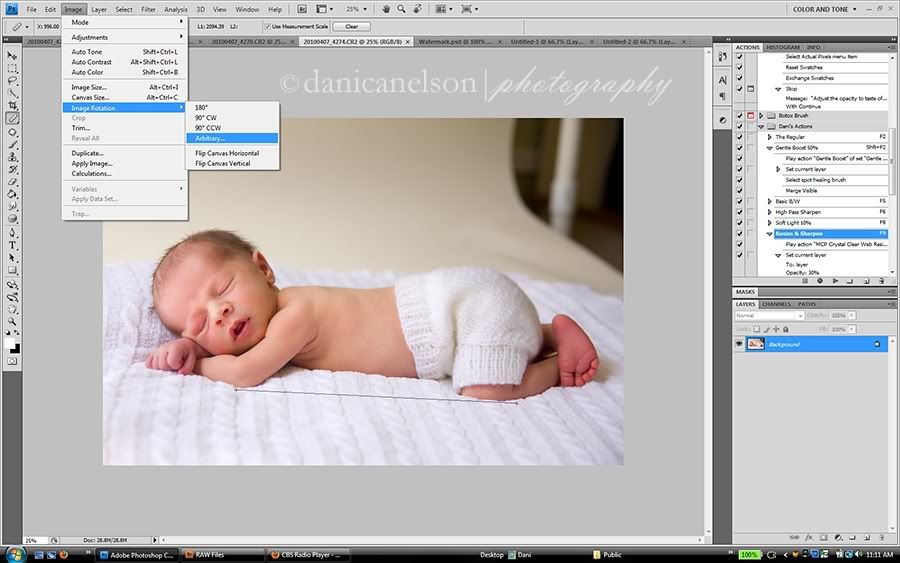
Don't change the angle. Hit okay.


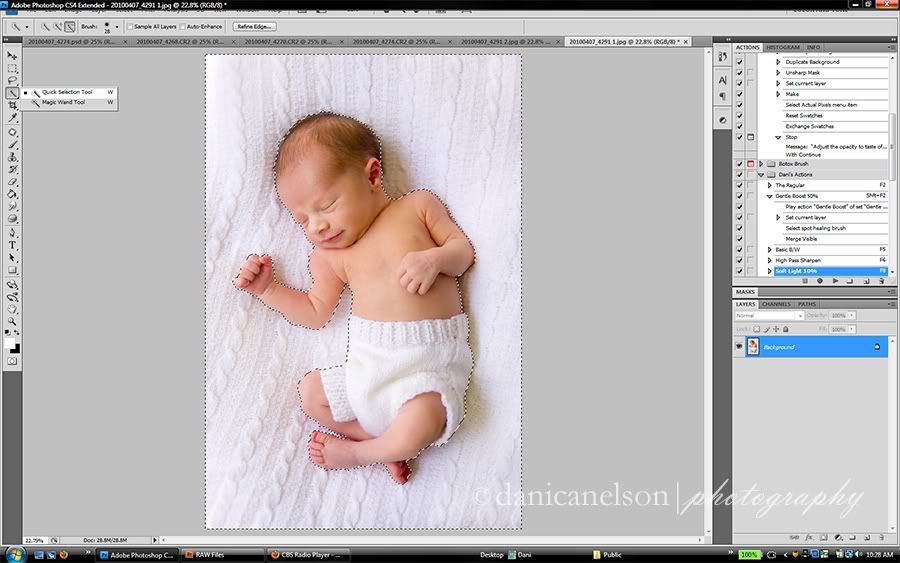
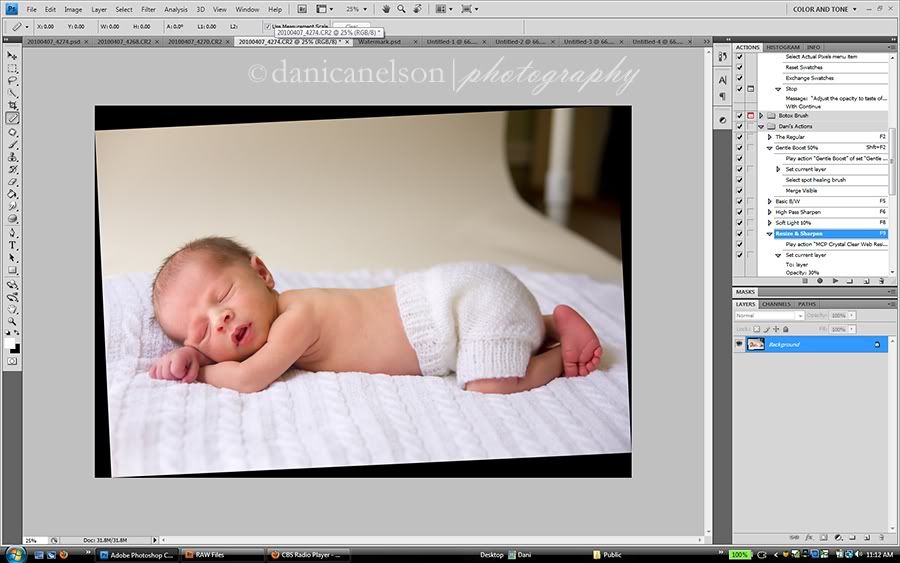
Done. Your image is straight. Now you need to crop and/or fill in those spaces on the edges. With my small "studio" space, I end up cloning out pieces of my background fairly often. You can use the clone tool, or you can use THIS METHOD of "stretching the canvas" from MCP Actions. I use this a lot.


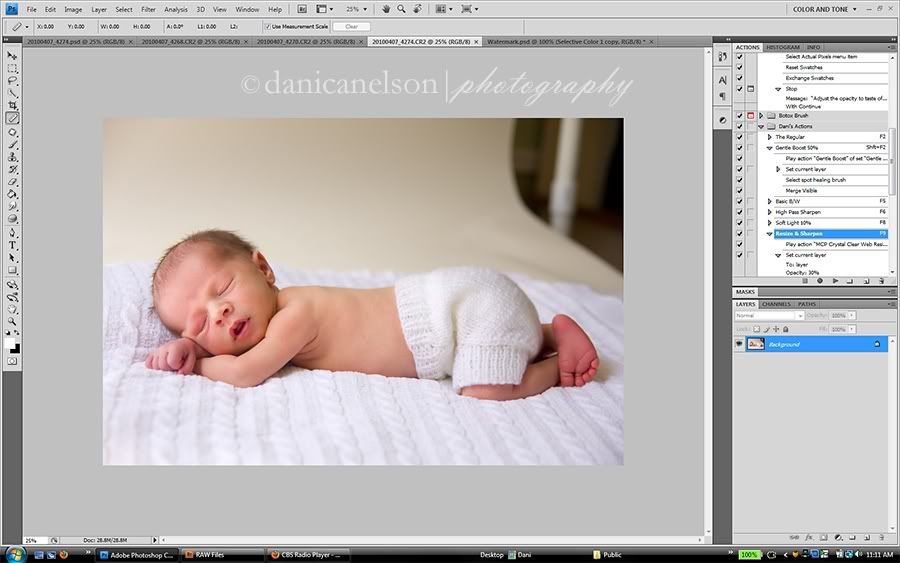
Here's the final image after filling in the missing pieces and a little Touch of Light. Oh, and getting rid of that blue tint in the blanket and diaper cover. Don't know how to do that? Read last week's Tell All Tuesday post HERE!


4.27.2010

Tell All Tuesday - Color Casts | Philadelphia Photographer

Hi all - sorry for the late Tell All Tuesday post! Better than nothin' is what I say.

Today we're going to talk about a specific type of color cast. Many times in images, clothing and accessories that are white end up having a color cast, or tint. Most commonly in my images, the cast is blue, yellow or magenta - or a combo of all three. This is a quick tutorial on how to get rid of that color cast.

*Also check out Ashley McNamara's tutorial on this HERE - it's a good one!*

Here's an image SOOC. Click on the Quick Selection Tool and select the white that is tinted. Sometimes I do all the white at the same time, and sometimes I do them piece by piece because the tint is different. This time I selected the blanket and not the diaper cover.


Sorry, I adjusted the color without taking a screen shot. This next one will show it. After I adjusted the blanket, there was a shadowy area that still looked wrong to me. I selected it. Then went to Hue/Saturation in the Adjustments palette.


I lowered the magenta. Ashley McNamara's tutorial shows you how to find out what color to decrease.


I also selected parts of the diaper cover that were magenta. Here's the image after fixing the color casts.


Make sense? Hopefully!

4.20.2010

Tell All Tuesday - Baby Tips | Philadelphia Photographer

It's time for another Tell All Tuesday. This time our question is from Jenny:

"So for a Tell all Tuesday idea, I'd love a list of suggestions for baby sessions...where you've bought some of your accessories (diaper cover, blankets) and any tips for someone about to do their first baby session!"

Well, I'm no expert on baby sessions, but I've done a lot of them and have a way I like to do them - so take or leave my suggestions! I'm not sure if by "baby" you mean a newborn, or an older baby, but for both I tend to keep my sessions pretty simple. I use simple props and like to focus on the child, especially capturing the details. Here is a list of the things I use the most and where I got them:

  • Diaper cover - I use a white knit diaper cover in nearly every baby session. I also have an off-white one. Both were bought on Etsy. I would highly suggest buying from Titchbiz's store. The cover I use most is from her store. It's the white Rib Leg diaper cover size S (2-5 months). It fits tiny newborns with some adjusting and also can stretch to fit some 6 month olds. Visit her store HERE. I want just about everything in it.
  • Doll bed - I use a basic wooden doll bed I bought from Ikea in the toy section. I painted it white. I use it for babies, and also sometimes use it as a bench for older children.
  • Blankets - I want more and better blankets. The best blankets are stretchy and washable. I think knits are beautiful. I wish I were a knitter!
  • NEWBORNS - I use a bean bag for my newborn sessions (it was $5 at a yard sale). I put a hot pad where the baby will be laying, and drape my blankets over it, pulling the blanket back tight and clipping it to my backdrop stand. I also use a sound machine with white noise or womb sounds, and also set a small space heater blowing really warm air directly on the baby. When the baby arrives (hopefully with just a diaper on), I put the diaper cover on and usually suggest Mom tops him/her off with milk. Then we may rock baby for a minute and place him/her on the bean bag right in front of the space heater. It doesn't usually take long before the baby is out. GETTING BABY ASLEEP IS THE KEY. I don't even bother turning on my camera until the baby is totally asleep. Once the baby is asleep, don't be afraid to touch/move/shift/bug the baby! He/she will stay asleep, and you want to make sure you can see all the important body parts...hands, fingers, toes - pay attention to where all these are! Most importantly, you must also pay close attention to how the light is falling on the face and make sure the face is being lit well. From my own experience, when the light is coming down from the top of the head across the face of the baby, the resulting shadowing is not flattering. I like to angle the baby around 45 degrees, or sometimes closer to front-lit. Use a small f-stop (a wide open aperture) so that the background blurs into a nice bokeh. During "set changes," have Mom or another helper hold baby in front of the space heater and make the change, then position the baby. When the baby is asleep, it's easy to get "the shot" in only a few tries, once everything is set up. It's allllll about setting it up right.
I hope some of these tips help! Good luck. Babies are hard, but so worth it.

4.13.2010

Tell All Tuesday - Loading Actions | Philadelphia Photographer

Tell All Tuesdays are back! Some of you have questions, and I'm here to answer as best I can. :)

From Julie (of J. Hawryluk Photography):

I downloaded a preset (from coffee shop) to get the images side by side when posting but I can't figure out how to load it into photoshop CS3? Would you mind doing a tutorial on that?

Julie mostly uses Lightroom to edit, so she had a question of how to load actions for use in Photoshop. My version is slightly different than Julie's (I have CS4), but it should be the same process for all versions. Elements is a bit different, but if you Google it you'll find good instructions! :)

Okay, so start by saving your downloaded action to your Actions folder (as detailed below).


Here's a shot of my Actions folder - the actions should have .ATN extensions. If there is a THUMBS file that is just an image for the action button once loaded.


In Photoshop, click on this little button to pull up the pop-out menu, then click on Load Actions. (I dragged my Actions palette out to the center of the screen so you can see it better.)


The Load box will come up. Click on the action you downloaded and want to load.


It should now show up in your Actions palette! Now just click on the little blue arrow next to the action to run it. Have fun!


4.07.2010

S Family | Philadelphia Child Photographer

Here's a peek at a recent Mini Session. Meet Sahara and her little sister Samantha. Miss Samantha wasn't really in the mood for a session, so it was fun but quick!


They're beautiful girls, no? Thanks Evelyn!

3.09.2010

Tell All Tuesday - Round Up | Philadelphia Child Photographer

Today's Tell All Tuesday is a simple round up of good photography finds I've been bookmarking lately (in no particular order):

- Becoming Mom - this website is awesome and has neat Photoshop tutorials that I've never seen anywhere else.
-Starting a Photography Business - advice from Shannon Holden that I found very helpful.
-Melissa Davis Design - lots of photography design freebies.
-Erin Cobb's new FAQ video - so many great tips for you photogs out there.
-Ashley McNamara's Photoshop Tutorials - she's a great photographer, and she's even greater in my book because she shares great Photoshop tutorials. I learn something from every single one...check them out!
-Becky Earl (BeArt) - another great photographer, and I recently found her Hints and Tips section. I'm excited to play around with her tutorials.
-Baby As Art - That masters of newborn photography share a video of them doing their chin-on-the-wrists pose...fun to watch.

That should keep you busy for a while! Have fun. It's BEAUTIFUL here and I couldn't be happier that's spring's almost here!

3.02.2010

Tell All Tuesday - Seamless | Philadelphia Photographer

You don't have to look far on my blog to see that I use seamless paper in almost every session I do in my home (also known as Mini Sessions). Several people have asked me what brand/colors I use, so I thought I'd do a quick Tell All Tuesday post about it.

I own two seamless papers, both of which are Savage brand and purchased on Amazon.com. They are the 57" x 12 yards size.

The first one is Bone (#51), a fairly new acquisition, and the second is Thunder Gray (#27):


These next two are ones I'd love to add to my collection - Ocean Blue (#36) and Coral (#3):


For an example of Ocean Blue in use, visit my awesome photog friend's blog: PHOTOGRAPHY BY LACEY. At least, I think that's Ocean Blue. Correct me if I'm wrong, Lacey! :) So nice though, right? It also helps if you have adorable built-in models and mad skillz like she does!

*Edited: Lacey's seamless is actually Baby Blue (#47) - sorry guys!

And for an example of Coral in use, visit a blog I recently stumbled upon called BECOMING MOM. I also love the fake distressed flooring she uses (I've seen it termed 'barnwood flooring' a lot), which is actually a giant mouse pad (basically). She links to where she bought it, but here's the LINK again just in case. I want one so badly right now. Just another thing to add to my wish list...Zack is thrilled.

Your turn to share: what are your favorite seamless colors?

2.26.2010

Cameron | Philadelphia Baby Photographer

Remember this drop-dead gorgeous (in a handsome way) baby boy, Cameron, from his summer mini shoot HERE? Well his first birthday is just around the corner! We had a fun little shoot, and I was excited to get some serious shots along with the smiles, since he is one of the most adorably serious babies I've ever known.


I love it! "Listen, lady, if you don't back off, I'm gonna hit you with this here leg!"


Ha! "Mom, you're making a fool of yourself."


I love that little boy: cheeks, rolls and all!

2.23.2010

Tell All Tuesday - Light | Philadelphia Photographer

Today's Tell All Tuesday post is a quick one about light. After getting the silhouette shot during Martha's session (see last post), I had her lean up against the wall of the arch for some closer portraits. I didn't pay attention to the light for a moment and shot a couple frames. When I quickly checked them out, I realized the lighting was terrible and I was shooting her from the complete wrong side. Simply walking around to the other side of Martha and shooting into the arch made a huge difference, right? In the first image, her face is mostly in shadows and the light is hitting only part of her face and very harshly. In the second image, she is lit evenly and her skin is naturally glowing (all of these images are SOOC - straight out of camera - except for an exposure fix in Camera RAW and a slight sharpening for web, by the way).


Finding the best light makes your post-processing so much easier and since I try to get it as close to right as possible IN the camera, it's important for me to always pay attention to light. Let me repeat that: ALWAYS ALWAYS ALWAYS pay attention to the light. Look around and see if another angle would light your subject more evenly. Try to look for natural reflectors in the environment around you (in this case the snow was doing a great job, but a white wall or reflective bumper would work) to bounce light into your subject's eyes so you get nice catchlights instead of dull, shadowy eyes. I'm far from perfect at this, and in the past have done a terrible job in some cases, but as I'm learning more and more it's becoming natural. Note the habits of the light coming into your home and practice placing your subjects in different ways until you get the best results. You'll begin noticing patterns and realizing the best way to light your subjects. Then when you're at a client's home, or outdoors on a shoot, you'll be better equipped to find the best light.

P.S. Another quick question from Adri: "What is a crop sensor camera?"

HERE'S AN ARTICLE that talks about the difference between a crop-sensor camera and a full-frame one. Canon cameras that are crop-sensor are the Rebel line and the 40D/50D/7D. The 5D and 5D Mark II are full-frame cameras (sorry Nikon users...I know the D700 is full-frame but am not sure about other bodies!). Some lenses are made for crop-sensor cameras (like my Tamron 17-50, which only works on crop-sensor bodies), but others aren't (like my Canon 85 1.8). My Canon 40D has a crop factor of 1.6, so when I put my 85mm lens on my crop-sensor camera, it is actually more like a 136mm lens. Does that make sense? A little bit? Let me know if you still have questions.

2.16.2010

Tell All Tuesday | Philadelphia Photographer

Question from J:

What lense do you use the most for indoor and outdoor? I am looking into getting a few new lenses but dont have millions to spend and its easy to spend alot. Also right now I dont have studio lighting just been using natural window light for indoor shots, should I invest in that if I have a shoot that doesnt have alot of natural light inside?

Well, first off, let me post a part of the FAQ section located HERE on my website:

Q: What equipment do you use?
A: I love when other photographers share what type of equipment they use, so although my equipment isn't my dream "line up," I'm happy to share what I currently own and shoot with. I started with a Canon Digital Rebel XT and loved it; however, in February 2009 I upgraded to a Canon 40D. Virtually every picture on my website was taken with my Tamron 17-50mm f/2.8 lens. In July 09 I was able to add the Canon 85mm f/1.8 lens to my bag and I love it. Since then I've used it almost exclusively for every outdoor session. I use the Tamron 17-50mm for every indoor shot, since the 85mm is too tight for me to use indoors on my crop sensor camera.

To add to that, I'll say that my dream line up (right now) is:
  • Canon 5D Mark II
  • 24-70mm f/2.8
  • 50mm f/1.2
  • 85mm f/1.2
Someday...but for now, I do like how the Tamron 17-50mm lens performs indoors. And the aperture is fixed at 2.8 throughout the range of the lens, which isn't common for zooms. So you can achieve a bit of nice-ish bokeh even zoomed in all the way to 50mm. It only works on crop-sensor cameras, though, just FYI. I also loooove my 85 1.8 lens. I've had a 50mm 1.8 in the past, and while it was better than, say, a kit lens, the 85 1.8 is a much better performer in my book. On my crop sensor camera, it makes it too tight to use indoors, but outdoors I adore it. And I found an almost-new mint copy on Craigslist for $300. Not bad for the quality of the lens.

Now onto the lighting question. I know that adding my light has helped me this winter...I like it because it doesn't add weird white balance issues...it seems to compliment the natural light very well and doesn't come off looking like any studio lights are being used at all. The one I own was only $40 on Amazon and is very low-watt, so it doesn't give off a ton of light at all. I think it's a pretty small investment that could definitely help in low-light situations. I'm also planning on investing in a reflector when I can, which I think will help utilize as much available natural light as possible. HERE'S A LINK to the light I own.

Thanks for your question, J! Hope that helps...

Blog Archive

  © Free Blogger Templates 'Photoblog II' by Ourblogtemplates.com 2008

Back to TOP