
I sorted through gobs of question emails (ha) and found a couple to use for today's Tell All Tuesday. This one comes from Amber C. -
"You helped me early with getting my picture larger - thanks. I had one more question- if you need to crop the photo when do you do this in relation to the MCP Crystal Clear action [she's referring to MCP's Crystal Clear Web Resize and Sharpening action found HERE]? I still feel like my pictures are pixelated on my blog compared to Photoshop and I am sure some of it is how well I take the picture in the first place but it is frustrating when it looks different from my edit screen and the web. It is also hit and miss, sometimes it looks great- any ideas on cropping would be great."
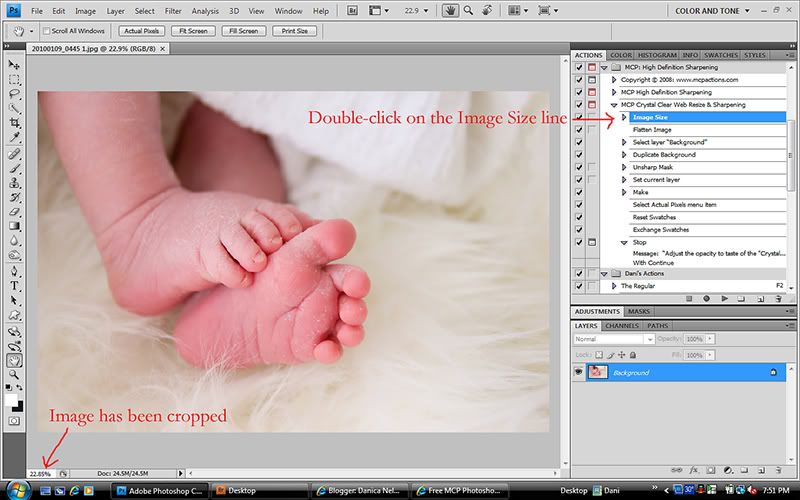
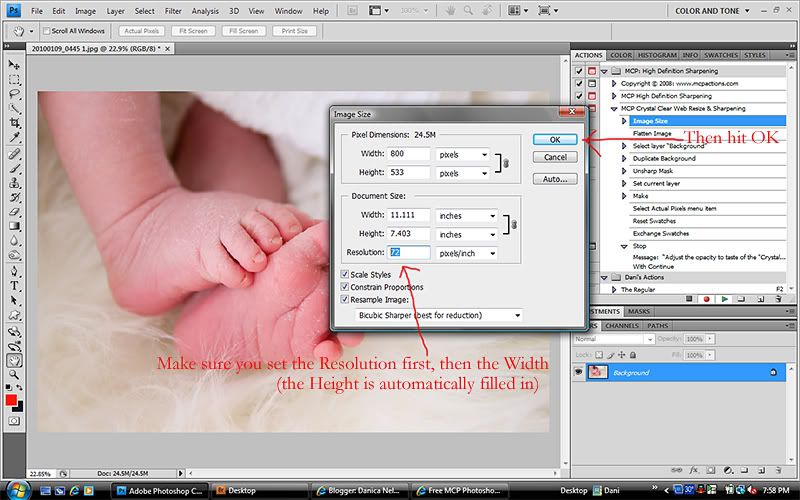
Well, Amber, although I'm no expert on these things, I'm happy to go into more detail on posting images online (my first post about it found HERE). You want to make sure you crop before you use do any resizing. When you resize an image, you specify the dimensions you want the image to have (in pixels). Once that resizing has occurred, the image won't look right with any other dimensions. That's one of the benefits of resizing (besides creating a smaller-sized, more maneagable image), since people won't be able to save your image and print it without losing major quality.
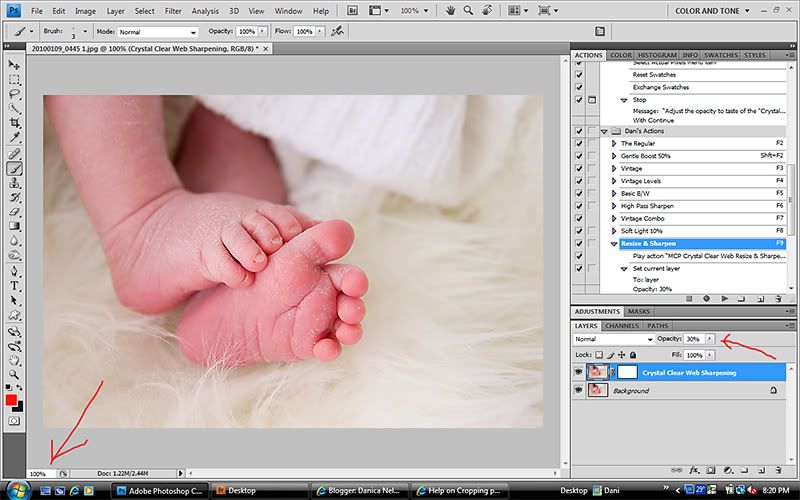
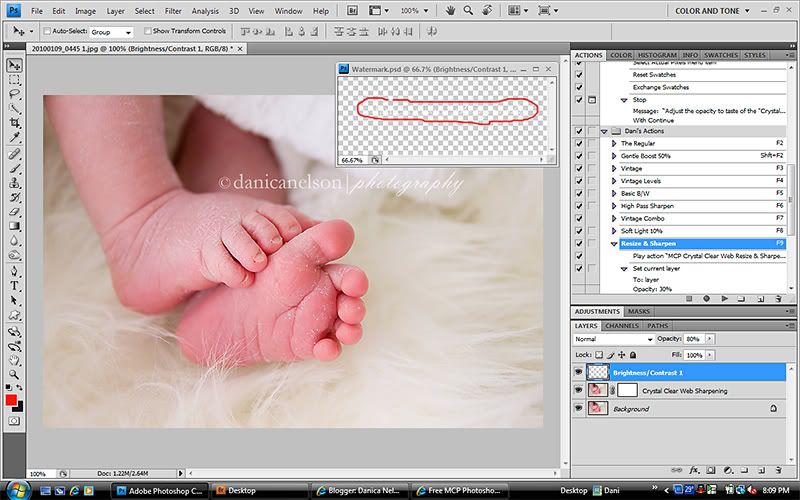
Here's a little play-by-play of what I do when I resize, sharpen and watermark the images I will be posting online so you can follow along in using the resize & sharpen action with cropped images. There are probably better and easier ways to do this - I just don't know them. So if anyone DOES, please feel free to share!
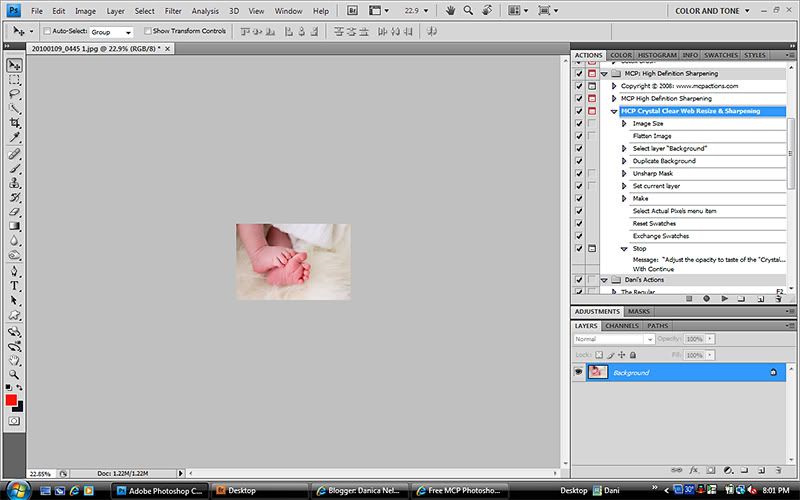

Now I open the .psd file that has my watermark logo on it (sorry you can't see it very well, the background on the .psd file is transparent, but I've circled where the text is). I simply click and drag the text over onto my main image, reposition it, flatten, and save my now resized, sharpened and watermarked image.
I've also gotten a few questions about my setup for the newborn shots I've recently shared. First, every single image was shot with my Canon 40D and my Tamron 17-50mm f/2.8 lens. While I don't like using that lens outside, inside it does a fairly good job. I'm happy with its performance on these. I used a new seamless paper background that I love - it's by Savage and the color is Bone (bought on Amazon.com). There were also a couple questions about my lighting. I used the same setup I shared in THIS POST, with my table next to two large windows; however, I also pulled out my small umbrella light since the winter light is much more diffused and doesn't come in as strongly as in the summer months. I used the umbrella light on the opposite side of the window for some fill light. I also used one of my favorite actions for newborn work, Touch of Light (found free on MCP Action's blog HERE) quite a bit in some of the shots to brighten the skin. And one last question was if I softened the skin or used Portraiture at all. I wish I could afford Portraiture right now, but I can't. Instead, I use an action called Botox Brush, which I bought from VIBE ACTIONS (I have the Mixed Ride set, which I bought for Elements, but which works fine in my new CS4). They sometimes have sales (like their 50% off sale last Black Friday) and I'm happy to pass along word of sales here when I get them.
Okay, all, hope that answered a few questions! Feel free to ask away any time you'd like - who knows, maybe another Tell All Tuesday will be in our futures...


2 comments:
I found this incredibly helpful. Especially the link to your previous post about the photo set-up in your house. Thanks for sharing. I am looking forward to another Tell All Tuesday. =0)
amazing, you are the best and I don't even know you. thanks for all the help!!!
Post a Comment